Install Ubuntu on Orange Pi Zero 3 and prepare it for home automation with MQTT and Home Assistant
The Orange Pi Zero 3 is a powerful Single Board Computer (SBC) that can serve as the heart of your home automation system. With its compact size, low power consumption, and ample processing power, it's an ideal choice for DIY enthusiasts looking to automate their homes. In this guide, we'll walk you through the steps to set up and use the Orange Pi Zero 3 for home automation. I have previously used a less capable SBC and even an old router to run a self hosted MQTT server. It is time for an upgrade.
The main point of this upgrade is to add functionality beyond MQTT, such as database storage, reports and Home Assistant. I really want the latter since I have some ESP8266 relays and sensors I currently use and I think ESPHome could speed up software development while being easy to integrate with Home Assistant. Note that you may use another SBC from the OrangePi family for this purpose. I chose Zero 3 because it is powerful enough while being similar in size with the existing Zero I currently use.
Getting started with the hardware
When you unbox your Orange Pi Zero 3, you will find the SBC board itself in an antistatic bag, with no accessories whatsoever (unless you ordered). I chose the 2 GB version of the board since I consider it enough for my needs. You will also need:
- MicroSD card (high speed 16GB or larger recommended; SBC manufacturer recommends SanDisk);
- Power adapter (5V and at least 3A; if considering USB peripherals, get one with enough current);
- USB to serial adapter, with 3.3 V levels. I will use the cheapest available based on CH340G;
- Keyboard and mouse (may be temporarily needed, until you configure SSH);
- HDMI cable and monitor (may be temporarily needed, until you configure SSH and/or remote access);
- Internet connection (Ethernet is preferred).
Consider building a 5V UPS which can store enough energy to prevent sudden shutdowns of the SBC. Explore the possibility of powering your Orange Pi Zero 3 with solar panels for energy-efficient operation.
Power failures may damage the file system and require starting all over again with installation and configuration. Also, after you're done setting it up, turn off, pull out the MicroSD card and make a backup of the entire file system.
 |
| Orange Pi Zero 3 SBC with required accessories |
It is recommended to place a self-adhesive heatsink on the Allwinner CPU. It tends to get quite hot. I also prepared a distribution box where I installed the SBC along with power supply and some other hardware (LAN switch and cable TV amplifier with splitter). An enclosure is highly recommended because it prevents dust getting on the SBC, however make sure of proper ventilation (add a cooling fan) to help spread the heat produced by electronics.
Home Assistant installation methods
Home Assistant is a complex software ecosystem which is available either as an operating system, container or standalone software. You must decide in advance which installation method you want because the operating system you will install on Orange Pi depends on this choice.
The easiest way to have Home Assistant is to get a hardware on which you can install HA OS, a customized Linux with preinstalled software. But this is not available for Orange Pi boards. More than that, it is a managed OS which is not very customizable if you want it to perform other tasks besides running Home Assistant. On the other hand you should not expect too much from Orange Pi either; although it has enough CPU and RAM, using SD card as storage will slow it down.
On Orange Pi and other Linux SBCs, there is Home Assistant Core which gets installed in a Python virtual environment. It is easier to install, however you will usually get delayed updates via pip3 package manager. It depends on the system-wide Python and sometimes you will get warning messages about using an older version of Python which is no longer supported by Home Assistant.
The other easier way of getting Home Assistant is using a Docker Container. This benefits of better update management and there are also additional containers for Home Assistant Add-Ons. It should be noted that both Core and Container installation methods will not come with the Add-ons Store in Home Assistant.
The most difficult installation method is Supervised which provides the full Home Assistant experience on a regular operating system, with a supervisor tool which manages the whole system and it will clean up, repair or reset settings to default if they no longer match expected values. This method is containerized and has strict requirements. One of them is that in only runs on Debian Bookworm.
Installing the host operating system
In the following posts I will show you how to install Home Assistant Core and Container. For these installation methods, both Debian and Ubuntu are suitable OSes. Because I regularly use Ubuntu desktop and I am familiar with it, I chose it for my SBC. Being more popular means you will have access to updated and more software packages. I don't need desktop environment, therefore I will get the server version. This is the download page for Pi Zero 3 SBC. I selected Ubuntu image, Linux 6.1 kernel version for development boards with 1 or 2 GB RAM, Jammy Server.
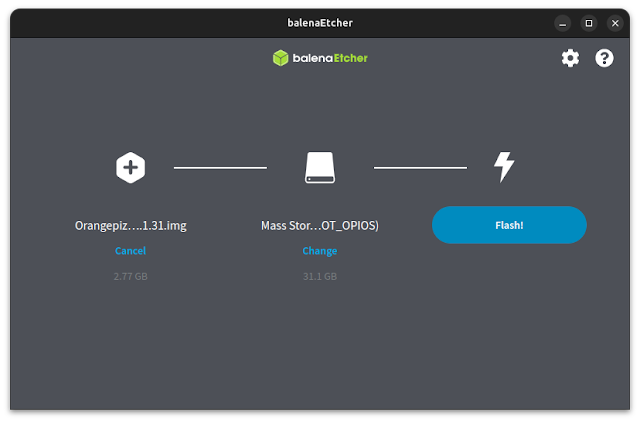
The easiest way to get this on the SD card is to use Etcher (on Windows or on Linux PC). Plug the microSD in a suitable adapter. Download and extract the OS image from archive (7-Zip is required). Etcher software is available for all desktop platforms and it is portable (for Linux it comes as an AppImage which you can run). User interface is very clean and straightforward. First you select source image, then the target storage. This is the step when you have to ba careful what you select. I recommend unplugging any other external storage device to avoid confusion. Etcher will not show by default your system drive. After you have selected target storage, just click on Flash! and it will start. At the beginning it needs your user password to format the SD card. It then writes the image and it also verifies it.
 |
| Etcher is ready to write Ubuntu image to SD card |
When it is done, close it and unmount the SD card if it got automatically mounted by the host operating system. Pull it out from the card reader and insert it in the dedicated slot of Orange Pi board.
Powering up for the first time
If you don't have an USB to serial adapter, just connect Orange Pi to Ethernet and power it while monitoring DCHP leases on your router administration interface. Wait a few minutes after it gets an IP address and then try to open a SSH terminal to that address from another computer in the same network. Default user and password are orangepi and orangepi.
Otherwise, you need to set up the serial terminal which will allow you to perform the initial configuration. I like to use PuTTY because it is free and works on Windows and Linux. You can get it on Ubuntu after enabling Universe repository with the following commands:
sudo add-apt-repository universe
sudo apt update
sudo apt install putty
Now take the USB to serial adapter and three DuPont jumper wires and connect everything as follows:
- On the opposite edge of micro HDMI connector, there is a 3-pin header named SIP3, with pins labelled TX, RX and GND. TX goes to RXD/RXI of the USB-serial adapter, RX goes to TXD/TXO and GND to GND. Plug the adapter in an USB extension cord and connect to computer.
- Insert microSD card if you haven't done so already.
- Go ahead and get a LAN cable from your local network. I do not recommend using WiFi and I will even disable it and remove the antenna.
- Launch PuTTY, select Serial mode, 115200 baud and enter correct port. How do you find it? Well, if you're on Windows open Device Manager and unplug then re-plug the USB serial adapter to see which COM port appears. If you're on Linux open a terminal and use ls /dev/tty* or to be more specific ls /dev/ttyUSB*. Repeat the command with the adapter plugged in, then unplugged. Write the port with complete path in PuTTY (i.e. /dev/ttyUSB0).
- Get the power supply ready and power the board.
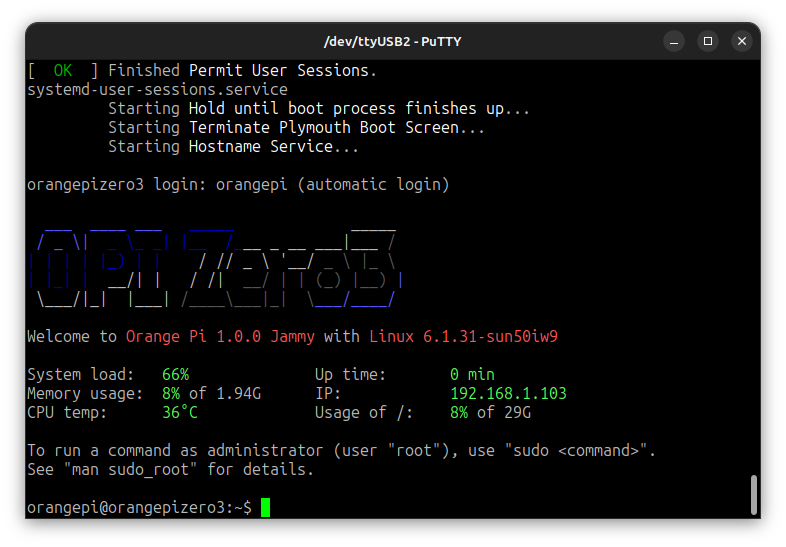
Wait patiently for the first boot to complete. It is going to take a while; however you should see output in PuTTY. If you don't see any output in PuTTY while the board LED is flashing, check again the port you selected and try swapping RX and TX jumper wires.
 |
| First boot of Orange Pi with Ubuntu Jammy |
Note that since this is the server version of Ubuntu it does not have a display manager, hence the low RAM usage. If you're curious or you can't get the serial terminal working, use HDMI to connect to a monitor and plug in an USB keyboard. You will see another terminal output on monitor.
While Orange Pi is booting or already running avoid cutting power to it. Instead use sudo reboot (or sudo poweroff).
Basic configuration
The default installation comes with two user accounts, a regular account named orangepi and the root account, which have the same password: orangepi. Let's configure network with:
sudo orangepi-config
Enter password as requested after this command. After the utility launches, use arrow keys and Enter to select Network. Go to WiFi and select Deactivate, then Quit. Then go to IP and select Static, since this server has to have the same IP so you can access it over network. You need to choose an available IP address and set netmask and gateway. Make sure you select an IP address that is outside of the allowable range of the addresses which can be assigned to local clients by your router (for example, my router's DHCP server is set to assign addresses 192.168.1.100 to 192.168.1.255 to clients, therefore everything from 192.168.1.2 to 192.168.1.99 is left for static assignments of my choice). Gateway is router's IP (in my case 192.168.1.1).
 |
| Setting static IP on Orange Pi |
Press Tab key after you have completed all fields, then Enter on OK to confirm. At this point you can quit PuTTY and disconnect serial adapter; you can get to the terminal over SSH at the IP you set, with PuTTY using the same credentials. However, there is no need to hurry. Let's continue configuration over the existing terminal.
Please note that the manual of Orange Pi recommends a different way of setting network configuration. It is easy and intuitive, however its main advantage is that it allows you to set more parameters, including DNS servers and IPv6 configuration. If you need advanced network interfaces configuration, use the following command:
sudo nmtui
Next, while I am in orangepi-config, I usually go to Personal section to set local timezone and I also customize Hostname (which can also be set from nmtui). If you want some services to be automatically discovered in the network, you should enable Avahi from System section. Once you are done with the configuration utility, let's close it (choose Back and Exit) and move on.
Let's update the installed software packages:
sudo apt update
sudo apt upgrade
If it says it has to modify some configuration files, you can type Y (from yes) and hit Enter to confirm. After it is done, perform a reboot.
Connecting via SSH
And this time disconnect the serial DuPont wires. We're switching to SSH. After reboot, if there are more updates, install them using the same commands. Use PuTTY or any other SSH client to connect to the IP address of the Orange Pi. For example, I would use in Ubuntu Terminal:
ssh orangepi@192.168.1.11
Then I have to confirm I want to connect (with yes) and enter user password (which is still orangepi).
Conclusion
Well, this was the first part and after this how-to I didn't even get to Home Assistant. But I have the Orange Pi ready. There are also some other steps to consider. The most important one is to change the default password. To do this, use passwd command. You can also create a different user account (and I even recommend you to do so) with adduser username command (replace username with what you want and run the command with sudo).
I opted for a different IP address for the new Orange Pi. However, you might consider discarding the old board and using its IP for the new one, if you previously had another automation server. No matter the circumstances, choose a static IP.
Further reading (work in progress):
- Part 2: Install Core version of Home Assistant.
- Part 3: Install Container version of Home Assistant.
- Part 4: Getting the server ready for remote access with secured Web interface.
- Part 5: Install MQTT broker and migrate older configuration.
- Part 6: How to move to Home Assistant Supervisor.


Home Assistant Supervised on Orange Pi Zero3
ReplyDeletehttps://forum.armbian.com/topic/28633-how-to-install-home-assistant-supervised-on-armbian-2302-jammy/
Download image:
https://github.com/armbian/community/releases/download/24.2.0-trunk.540/Armbian_community_24.2.0-trunk.540_Orangepizero3_bookworm_current_6.6.16.img.xz
Install to SD (balenaEther)
Boot and configure
Reboot if required. Most of steps as root user.
Configure network
ambrian-config to static address
apt install apparmor
echo "extraargs=apparmor=1 security=apparmor systemd.unified_cgroup_hierarchy=false systemd.legacy_systemd_cgroup_controller=false" >> /boot/armbianEnv.txt
update-initramfs -u
apt-get install jq wget curl avahi-daemon udisks2 libglib2.0-bin network-manager dbus -y
Install os-agent:
wget https://github.com/home-assistant/os-agent/releases/download/1.6.0/os-agent_1.6.0_linux_aarch64.deb
nano /etc/os-release
first line must be
PRETTY_NAME="Debian GNU/Linux 12 (bookworm)"
...
dpkg -i os-agent_1.6.0_linux_aarch64.deb
Install Docker as regular user:
sudo curl -fsSL get.docker.com | sh
wget https://github.com/home-assistant/supervised-installer/releases/download/1.7.0/homeassistant-supervised.deb
dpkg -i homeassistant-supervised.deb
Select qemuarm-64
Wait and look when we have service listen on 8123
ss -tulpn| grep 8123
Login to HA webUI
https://192.168.1.xxx:8123
Additional steps:
1. Addon "Mosquitto broker"
2. Addon "Terminal & SSH"
3. HACS
run Terminal
wget -O - https://get.hacs.xyz | bash -
https://hacs.xyz/docs/configuration/basic
3. https://github.com/zigbee2mqtt/hassio-zigbee2mqtt#installation
4. Upload fullbackup
5. Restore fullbackup
This tutorial is garbage tbh. I saw all this stuff about dupont jumpers and other nonsense before I looked for a better guide. This person has barely any idea what they are doing lmao.
ReplyDeleteSearch on youtube for this: Complete Guide: Installing Home Assistant Supervised on Orange Pi Zero 3
It's a video from the official orangepi youtube channel explaining step by step how to accomplish full supervised install of HA which is better than both the docker and the core version this guide doesn't even fully explain how to install.
To whoever wrote this guide, sorry if you found this harsh? I think your time would be better spent doing something else than writing useless guides like this. Maybe take up gardening
Thank you for your feedback. And yes, I do gardening too!
Delete